2.12 - Feel the Light
The photoresistor is a typical device for analog inputs and it is used in a very similar way to a potentiometer. Its resistance value depends on the intensity of the light, the stronger the irradiated light, the smaller its resistance value; conversely, it increases.
Schematic
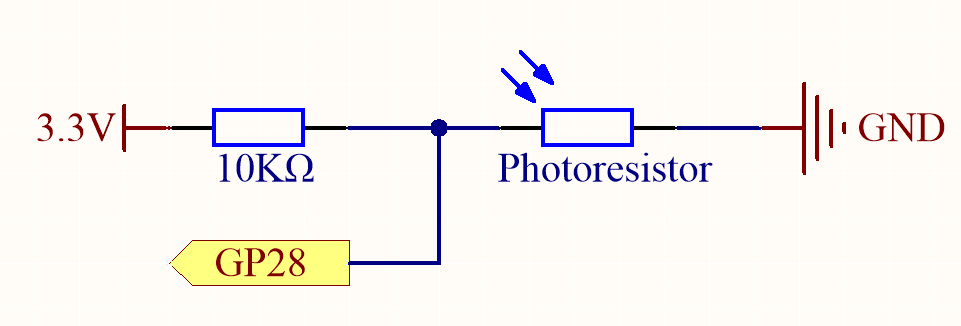
In this circuit, the 10K resistor and the photoresistor are connected in series, and the current passing through them is the same. The 10K resistor acts as a protection, and the GP28 reads the value after the voltage conversion of the photoresistor.
When the light is enhanced, the resistance of the photoresistor decreases, then its voltage decreases, so the value from GP28 will decrease; if the light is strong enough, the resistance of the photoresistor will be close to 0, and the value of GP28 will be close to 0. At this time, the 10K resistor plays a protective role, so that 3.3V and GND are not connected together, resulting in a short circuit.
If you place the photoresistor in a dark situation, the value of GP28 will increase. In a dark enough situation, the resistance of the photoresistor will be infinite, and its voltage will be close to 3.3v (the 10K resistor is negligible), and the value of GP28 will be close to the maximum value of 65535.
The calculation formula is shown below.
(Vp/3.3V) x 65535 = Ap
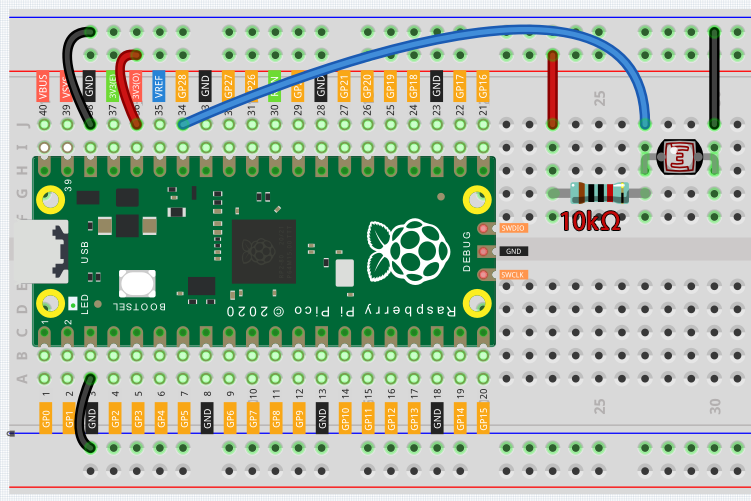
Wiring
code
Note
You can open the file
2.12_feel_the_light.inounder the path ofeuler-kit/arduino/2.12_feel_the_light.Or copy this code into Arduino IDE.
For detailed tutorials, please refer to Open & Run Code Directly.
Or run this code directly in the Arduino Web Editor.
Don’t forget to select the Raspberry Pi Pico board and the correct port before clicking the Upload button.
After the program runs, the Serial Monitor prints out the photoresistor values. You can shine a flashlight on it or cover it up with your hand to see how the value will change.